How to Make Lippan Art at Home: A Step-by-Step Guide
Lippan art, also known as mud mirror art, is a traditional craft that originated in the Kutch region of Gujarat, India. This stunning art form involves creating intricate designs using a mixture of clay and mirrors, resulting in dazzling patterns that reflect light and add a unique charm to any space. With its growing popularity in home decor, many are now looking to bring this beautiful art form into their homes.
What is Lippan Art?
Lippan art is a centuries-old craft practiced by the Rabari community in Kutch. Traditionally, it was used to decorate the interiors of huts with elaborate patterns made from mud and mirrors. The combination of natural earth tones and shimmering mirrors creates a mesmerizing effect, making Lippan art a popular choice for contemporary home decor.
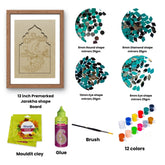
Materials You’ll Need for Lippan Art:
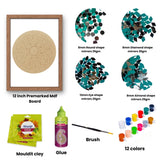
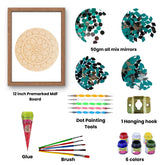
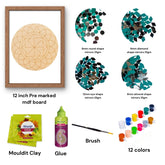
Clay or Mud:
Traditionally, Lippan art is made using clay, but you can also use air-dry clay, plaster of Paris, or a clay-based mixture for convenience.
Mirrors:
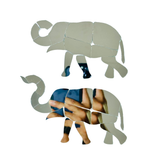
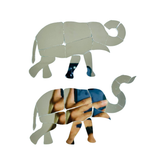
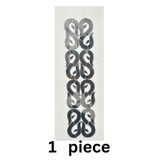
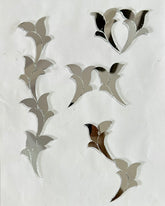
Small, round mirrors are typically used in Lippan art. These can be found in craft stores or online.
Plywood or Canvas:
A sturdy base is essential for your artwork. Use plywood, canvas, or a wooden board to support your design.
Glue:
Use strong adhesive glue to attach the mirrors and secure the clay onto the base.
Palette Knife or Sculpting Tools:
These tools will help you shape and carve the clay into intricate patterns.
Acrylic Paints:
If you wish to add color to your Lippan art, acrylic paints work well on clay and other surfaces.
Step-by-Step Guide to Making Lippan Art:
Prepare Your Base:
Start by preparing the base where you’ll create your design. If using plywood, sand it down to ensure a smooth surface. If you’re using canvas, make sure it’s securely stretched over the frame.
Create the Clay Mixture:
Mix your clay or mud with water to achieve a pliable consistency. You can add a bit of glue to the mixture for extra durability. Knead the clay until it’s smooth and ready to work with.
Sketch Your Design:
Lightly sketch your design on the base using a pencil. This will serve as a guide as you apply the clay. Traditional Lippan designs often feature geometric patterns, floral motifs, and intricate swirls.
Apply the Clay:
Using your hands or a palette knife, apply the clay to the base following your sketch. Build up the clay to create a three-dimensional effect. Don’t worry about perfection—Lippan art is meant to have a handcrafted, organic feel.
Embed the Mirrors:
While the clay is still wet, press the small mirrors into the clay according to your design. Be sure to press them firmly so they’re securely embedded in the clay.
Add Details:
Use sculpting tools or a palette knife to refine the details of your design. Carve patterns, add texture, and smooth out the clay as needed.
Let It Dry:
Allow the clay to dry completely. Depending on the thickness of the clay and the humidity, this could take several days. Ensure the artwork is kept in a dry, dust-free environment during this time.
Paint Your Artwork:
Once the clay is dry, you can add color to your Lippan art using acrylic paints. Traditional Lippan art is usually left in its natural clay color, but adding paint can give your piece a modern twist.
Seal the Artwork:
To protect your Lippan art, apply a clear varnish or sealant. This will help preserve the clay and prevent it from cracking over time.
Tips for Creating Beautiful Lippan Art:
Start Small:
If you’re new to Lippan art, start with a smaller project to get a feel for the materials and techniques.
Experiment with Designs:
Don’t be afraid to experiment with different patterns and motifs. Lippan art is highly customizable, so let your creativity shine.
Practice Patience:
Lippan art requires patience, especially during the drying process. Take your time to ensure each step is done carefully.
Incorporate Other Elements:
Consider incorporating beads, shells, or other decorative elements into your design for added texture and visual interest.
Incorporating Lippan Art into Your Home Decor:
Wall Art:
Create large Lippan art panels to hang as statement pieces in your living room, hallway, or bedroom.
Furniture Accents:
Apply Lippan art techniques to furniture pieces like tables, cabinets, or even headboards for a unique and artistic touch.
Decorative Trays:
Make smaller Lippan art pieces on trays or platters to use as decorative accents on coffee tables or sideboards.
Mirror Frames:
Enhance the beauty of mirrors by creating Lippan art around the frame.
Conclusion:
Lippan art is a beautiful way to bring traditional Indian craftsmanship into your home. By following this step-by-step guide, you can create your own stunning Lippan art pieces that reflect your creativity and love for handmade decor. Whether you’re a seasoned crafter or new to the world of DIY, Lippan art offers a fulfilling and rewarding experience. So, gather your materials, unleash your creativity, and start crafting your own piece of Indian heritage today!


