DIY Lippan Art: A Step-by-Step Guide to Creating Stunning Wall Decor
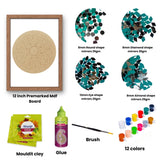
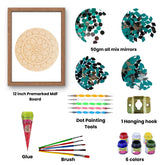
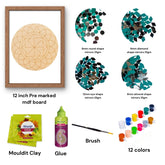
If you’ve ever walked into a room and felt its walls whispering for some life, you’re not alone. Enter the world of DIY lippan art—a vibrant and colorful way to transform any wall into a stunning masterpiece! Lippan art, a traditional craft from India, combines clay with mirror work to create intricate designs that can brighten up any space. It’s not just for seasoned artists; this guide is perfect for beginners diving into the world of creative decor. With our easy-to-follow lippan art kit, you can channel your inner Picasso (or perhaps the more relatable, slightly messy artist) without breaking a sweat. So, what do you need to get started? A good lippan art kit will include essential lippan art supplies like clay, mirrors, and tools specific for molding and adhering your designs. Here’s a quick checklist to ensure you're fully equipped:
- High-quality air-dry clay
- Small mirrors or reflective pieces
- Adhesive suitable for clay and mirror
- Lippan art tools (like spatulas and brushes)
- A sturdy base canvas or wall space
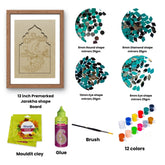
And if you're wondering where to buy these magical kits, look no further! Crafting your own lippan masterpieces has never been easier with options like the Jarokha Shape Lippan Art 250 DIY Kit. This is where creativity meets accessibility—perfect for those who might not have time to scour craft stores looking for elusive supplies.
Understanding Lippan Art: A Brief History
Understanding the roots of lippan art is like taking a colorful journey through the vibrant cultures of India. This stunning craft dates back centuries, originating from the rural areas of Gujarat and Rajasthan, where artisans have passed down their skills from generation to generation. Traditionally, lippan art involves using clay mixed with reflective glass or mirror pieces, creating intricate, shimmering designs that tell stories of heritage and craftsmanship. It’s a celebration of creativity, and believe it or not, it was initially used to adorn mud huts, transforming them into eye-catching masterpieces.
If you're ready to join this age-old tradition and infuse your home with unique wall decor, look no further than our carefully curated lippan art kits. These kits provide everything you need: clay, mirrors, and tools designed specifically for crafting! The beauty of modern lippan art is that you don’t need to be a master artist to start creating; all you need is enthusiasm and a little guidance.
Essential Lippan Art Supplies and Tools
- High-Quality Air-Dry Clay: The foundation of your art. Choose a clay that’s easy to mold and dries well without cracking.
- Mirrors or Reflective Pieces: These add that magical sparkle! You can use small glass mirrors or reflective acrylic pieces.
- Adhesive: A strong adhesive suitable for both clay and mirrors is vital. Look for craft glue or epoxy specifically designed for these materials.
- Lippan Art Tools: Essential tools include spatulas for smoothing edges, brushes for applying colors, and sculpting tools for detailing. Investing in quality tools can make a world of difference!
- A Sturdy Base Canvas or Wall Space: Whether you're working on a canvas or directly on the wall, ensure it's clean and ready to hold your masterpiece!
But wait! You might be thinking, “Where do I get all these supplies?” Well, you’re in luck! Our specially curated lippan art kits come packed with everything you need—just open the box, and get started!
Step-by-Step Lippan Art Tutorial
Now, let’s get into the nitty-gritty of crafting your very own lippan art! This step-by-step lippan art tutorial will guide you through transforming ordinary materials into a stunning piece that could easily steal the spotlight in any room. Ready? Let’s roll up those sleeves and get started!
Step 1: Prepare Your Workspace
Choose a clean, flat surface to work on—your dining table might do, but consider laying down some newspaper or a plastic sheet for easy cleanup later. A well-prepared space is vital for unleashing your creative genius without distractions (or clay crumbs everywhere!).
Step 2: Gather Your Lippan Art Supplies
Before you dive in, lay out all your lippan art supplies. Having everything within arm's reach ensures you won't accidentally end up with clay-covered feet while rummaging for tools!
- Air-dry clay
- Small mirrors or reflective pieces
- Adhesive suitable for clay and mirror
- Lippan art tools (spatulas, brushes)
- A sturdy base canvas or wall space
Step 3: Molding the Clay
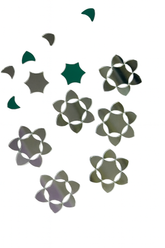
Take a generous amount of air-dry clay and knead it until it’s soft and pliable. Roll it into small balls and then flatten them between your palms to create discs that will act as the base for your designs. Play around with shapes—stars, flowers, or even abstract forms—whatever tickles your fancy!
Step 4: Crafting Your Design
Once you have enough clay pieces ready, it’s time to arrange them on your canvas. Don’t hesitate! Lay out those discs in stunning patterns; use symmetry or asymmetry to add interest. If you're feeling ambitious, incorporate small mirror pieces among the clay to reflect light beautifully. The possibilities are limitless!
Step 5: Assembling the Pieces
Using adhesive suitable for clay and mirrors, secure each piece onto the canvas carefully. Don’t rush; ensure each disc has a solid bond—you wouldn’t want a piece falling off when someone admires your handiwork!
Step 6: Finishing Touches
Let your masterpiece dry completely (usually takes about 24 hours). Once dry, grab some paint or natural colors if you want to enhance certain elements of your design. Adding color can make those reflective mirrors pop even more!
Step 7: Display Your Artwork
Once everything is set and dried—and after you've admired it long enough—find the perfect spot on your wall where this beauty can shine. Remember, lippan art isn't just decor; it's a conversation starter!
Your stunning new wall decor is more than just an aesthetic addition; it's now a reflection of your creativity and hard work! Every step taken with love adds character to every swirl and twirl.
If you're eager to start creating but unsure where to find supplies, explore our marvelous selection of lippan art kits. They’re curated perfectly for anyone looking to dive into this vibrant craft without any hassle.
So there you have it—a complete guide to making enchanting DIY lippan art! Now go forth and ignite those walls with stories of creativity.
Lippan Art Techniques and Patterns
As you dive into the world of lippan art, you'll quickly discover that the techniques and patterns involved are as rich and diverse as the cultures they stem from. From traditional motifs to modern interpretations, lippan art offers endless possibilities to express your creativity. Understanding these techniques not only enhances your artwork but also deepens your appreciation for this age-old craft.
- Clay Molding: The foundation of lippan art lies in how you mold and shape the clay. You can create various textures by using tools like spatulas or palette knives to give depth to your pieces.
- Mirror Placement: Strategically placing reflective pieces is crucial. Mirrors can highlight certain sections of your art, drawing attention and creating dynamic visual effects.
- Color Application: Use natural dyes or acrylic paints to add vibrant colors to your creations. Whether it's subtle earth tones or bold hues, color can dramatically alter the perception of your artwork.
- Pattern Creation: Drawing inspiration from nature is a hallmark of traditional lippan art. Floral patterns, geometric shapes, or whimsical motifs can be integrated into your designs. Don't hesitate to innovate; blending traditional patterns with modern flair can lead to stunning results!
For beginners, it’s often helpful to start with established patterns before venturing into designing your own. Consider using simple shapes like circles or triangles as a base and experiment by layering textures or mirroring effects over them. The Rangoli Shape Lippan Art DIY Kit, for instance, provides a fantastic starting point with pre-designed templates that can guide you through the process.
Moreover, don't shy away from searching online for inspiration! Countless tutorials on platforms like Pinterest and YouTube delve into specific techniques and unique pattern ideas suitable for various skill levels. Incorporating elements from other crafts—like embroidery or painting—can also yield beautiful results!
If you're ready to get started on this creative journey but need quality supplies at hand, exploring our range of lippan art kits can set you on the right path without any hassle! Dive into crafting today—your walls are just waiting for a splash of color!


